

Le vernis semi-permanent est une solution pérenne pour une manucure parfaite sur le long terme ! Comment la faire à la maison ? Il s'agit de suivre les bonnes étapes.
Le vernis semi-permanent a le vent en poupe, on peut s'amuser de son style et on le garde des semaines ! Idéal quand on part en vacances, on aimerait pouvoir en profiter toute l'année... Bémol, le vernis semi-permanent s'applique généralement en institut et peut coûter cher si on décide d'en faire un rituel. Heureusement, les marques l'ont bien compris et elles sont de plus en plus à proposer de faire sa manucure semi-permanente soi-même, à la maison.
Découvrez notre sérum ongles
Vernis semi-permanent, vernis classique, quelle différence ?
Il faut le savoir. Le vernis classique peut durer jusqu'à une semaine, voire un peu plus si vous avez de la chance, avant de s'écailler ou de s'effriter... Le vernis semi-permanent peut durer jusqu'à trois semaines, voire plus, sans s'écailler ni s'effriter. D'autres facteurs majeurs différencient les deux vernis. Le temps de séchage par exemple. Le vernis normal sèche à l'air libre et peut prendre entre 10 et 20 minutes pour sécher complètement. Le vernis semi-permanent est durci sous une lampe UV ou LED, et il ne faut que quelques minutes pour qu'il sèche complètement. La technique d'application est différente pour les deux types de vernis. Le vernis classique est généralement appliqué en deux couches, alors que le vernis semi-permanent nécessite une base, deux couches de couleur et un top coat. Il est important de retirer la couche collante qui reste après le durcissement sous la lampe UV ou LED. Concernant le retrait, le vernis normal est facile à retirer avec du dissolvant à ongles. Quant à comment enlever du vernis semi-permanent, c'est un peu plus difficile. Le vernis semi-permanent nécessite un retrait professionnel avec un dissolvant spécifique et une technique d'enveloppement avec du coton imbibé de dissolvant.
En somme, le vernis semi-permanent est plus durable que le vernis normal, il sèche plus rapidement… Cependant il nécessite une technique d'application plus complexe et un retrait bien plus embêtant.
Découvrez notre sérum ongles
Mettre du vernis semi-permanent étape par étape
Vous l'avez compris, l'application du vernis semi-permanent nécessite une routine bien huilée autour de différentes étapes.
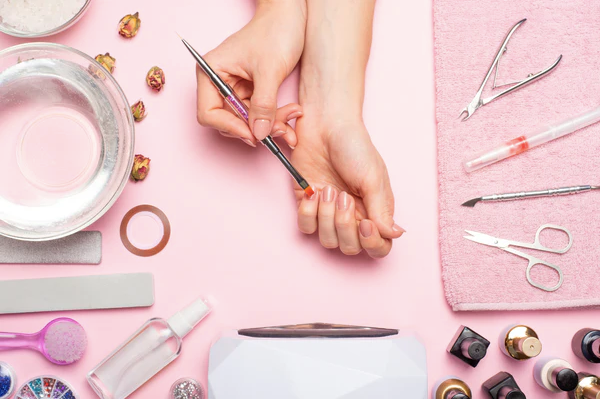
Pour commencer, avoir le bon matériel
Pour appliquer du vernis semi-permanent, vous aurez besoin de certains matériels et outils spécifiques. Voici une liste de matériel recommandé pour appliquer votre vernis semi-permanent :
-
Une lampe UV ou LED (48 watts)
-
Une lime à ongles
-
Un pousse cuticules
-
Un nettoyant pour ongles
-
Une base coat
-
Des vernis semi-permanents
-
Un top coat
-
Des carrés de coton et du dissolvant
Il est important d'utiliser des outils et des produits de qualité pour obtenir un résultat optimal et prolonger la durée de votre vernis semi-permanent...
Découvrez notre sérum ongles
Faire une manucure avant la pose du vernis semi-permanent
Il est essentiel d'avoir des mains préparées avant d'appliquer le vernis semi-permanent. On pense donc à une petite session manucure avant de peindre ses ongles, ce qui inclut : un nettoyage des mains et des ongles (de fond en comble), un gommage des mains, la pose d'un soin doux et d'une huile nourrissante qui va ramollir les cuticules et permettre de mieux les traiter par la suite. Si vous avez les ongles striés, vous pouvez également très légèrement les poncer afin de lisser la surface et permettre au vernis d'adhérer plus facilement.

La pose du vernis semi-permanent par étapes
Maintenant que les mains sont fraîches et prêtes à recevoir leur pose de vernis, il y a encore quelques petites étapes à retenir.
Préparez vos ongles :
Retirez tout vernis à ongles existant à l'aide d'un dissolvant, puis limez et façonnez vos ongles selon vos préférences. Utilisez un pousse-cuticules pour repousser les cuticules et coupez les ongles si nécessaire.
- Préparez vos cuticules : Appliquez de l'huile à cuticules sur les cuticules pour les ramollir. Utilisez un bâtonnet de buis pour repousser les cuticules et retirer tout excès de peau.
- Nettoyez vos ongles : Utilisez un nettoyant pour ongles pour enlever toute trace d'huile ou de poussière de la surface de l'ongle, puis appliquer un sérum ongles protecteur qui va nourir l'ongle avant la pose des différents produits.
- Appliquez une base coat : Appliquez une couche de base coat pour protéger vos ongles et faciliter l'adhérence du vernis semi-permanent. Veillez à ne pas toucher vos cuticules ou votre peau.
- Durcissez la base coat : Placez vos mains sous une lampe UV ou LED pendant le temps recommandé par le fabricant pour durcir la base coat.
- Appliquez le vernis semi-permanent : On prend son temps et on le fait avec minutie. On applique d’abord une fine couche de semi-permanent en partant de la base de l’ongle jusqu’à son extrémité en veillant à ne pas déborder. On passe ensuite ses mains sous la lampe, pour faire sécher la couche et on renouvelle toute l’opération une à deux fois selon le résultat plus ou moins intense voulu.
- Appliquez un top coat : Appliquez une couche de top coat pour sceller le vernis semi-permanent et lui donner un aspect brillant. Durcissez sous la lampe UV ou LED.
- Nettoyez les bavures : Utilisez un coton-tige imbibé de dissolvant pour enlever tout vernis à ongles excessif autour de l'ongle.
- Hydratez vos cuticules : Appliquez de l'huile à cuticules, de la crème hydratante sur vos mains pour les hydrater.
En suivant ces étapes, vous pouvez réaliser une manucure semi-permanente professionnelle à la maison. Assurez-vous de suivre les instructions du fabricant pour chaque produit utilisé et de respecter le temps de durcissement recommandé pour chaque couche sous la lampe UV ou LED.